|
Jude Fritts
Wood Carving & Sculpture |
|
|
|
|
Workshop Videos
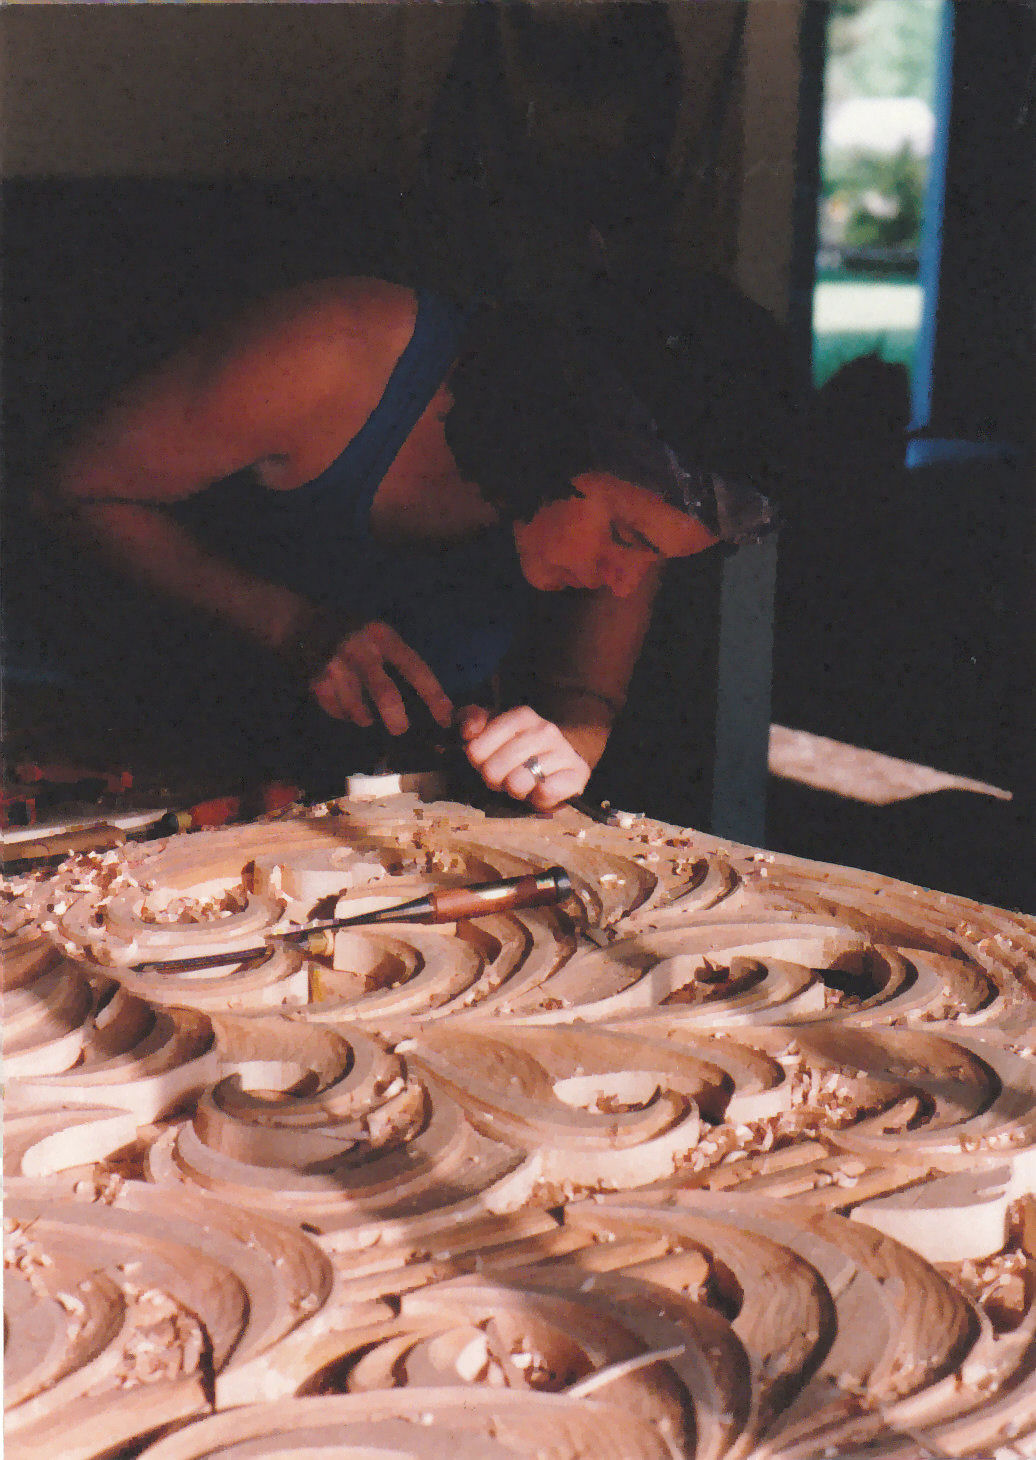
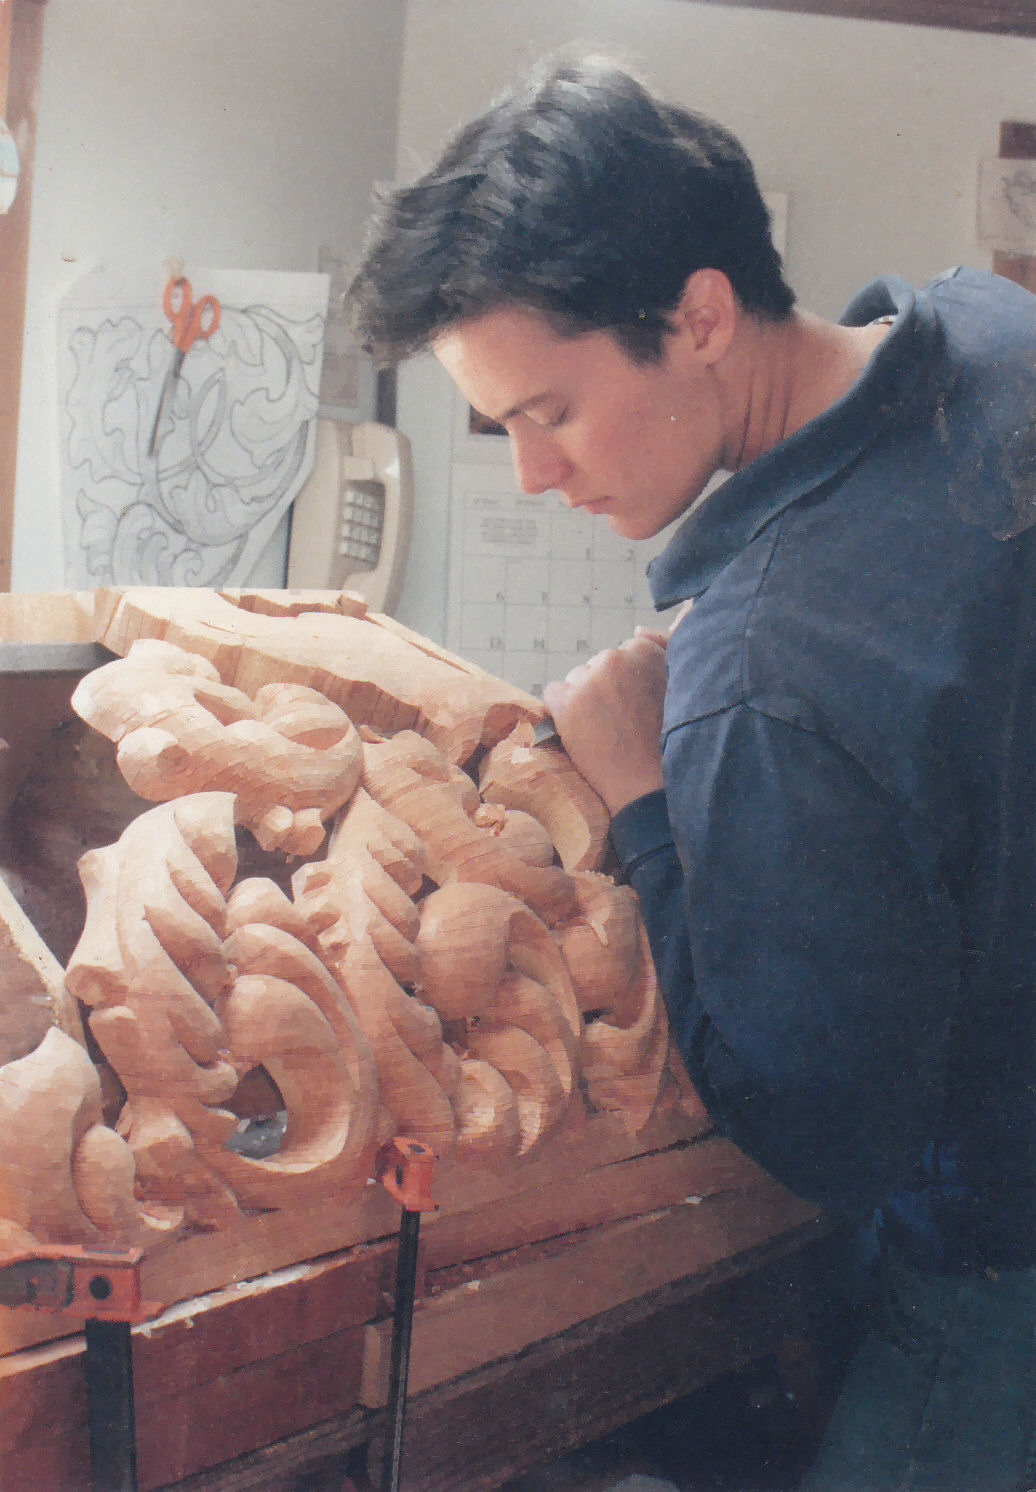
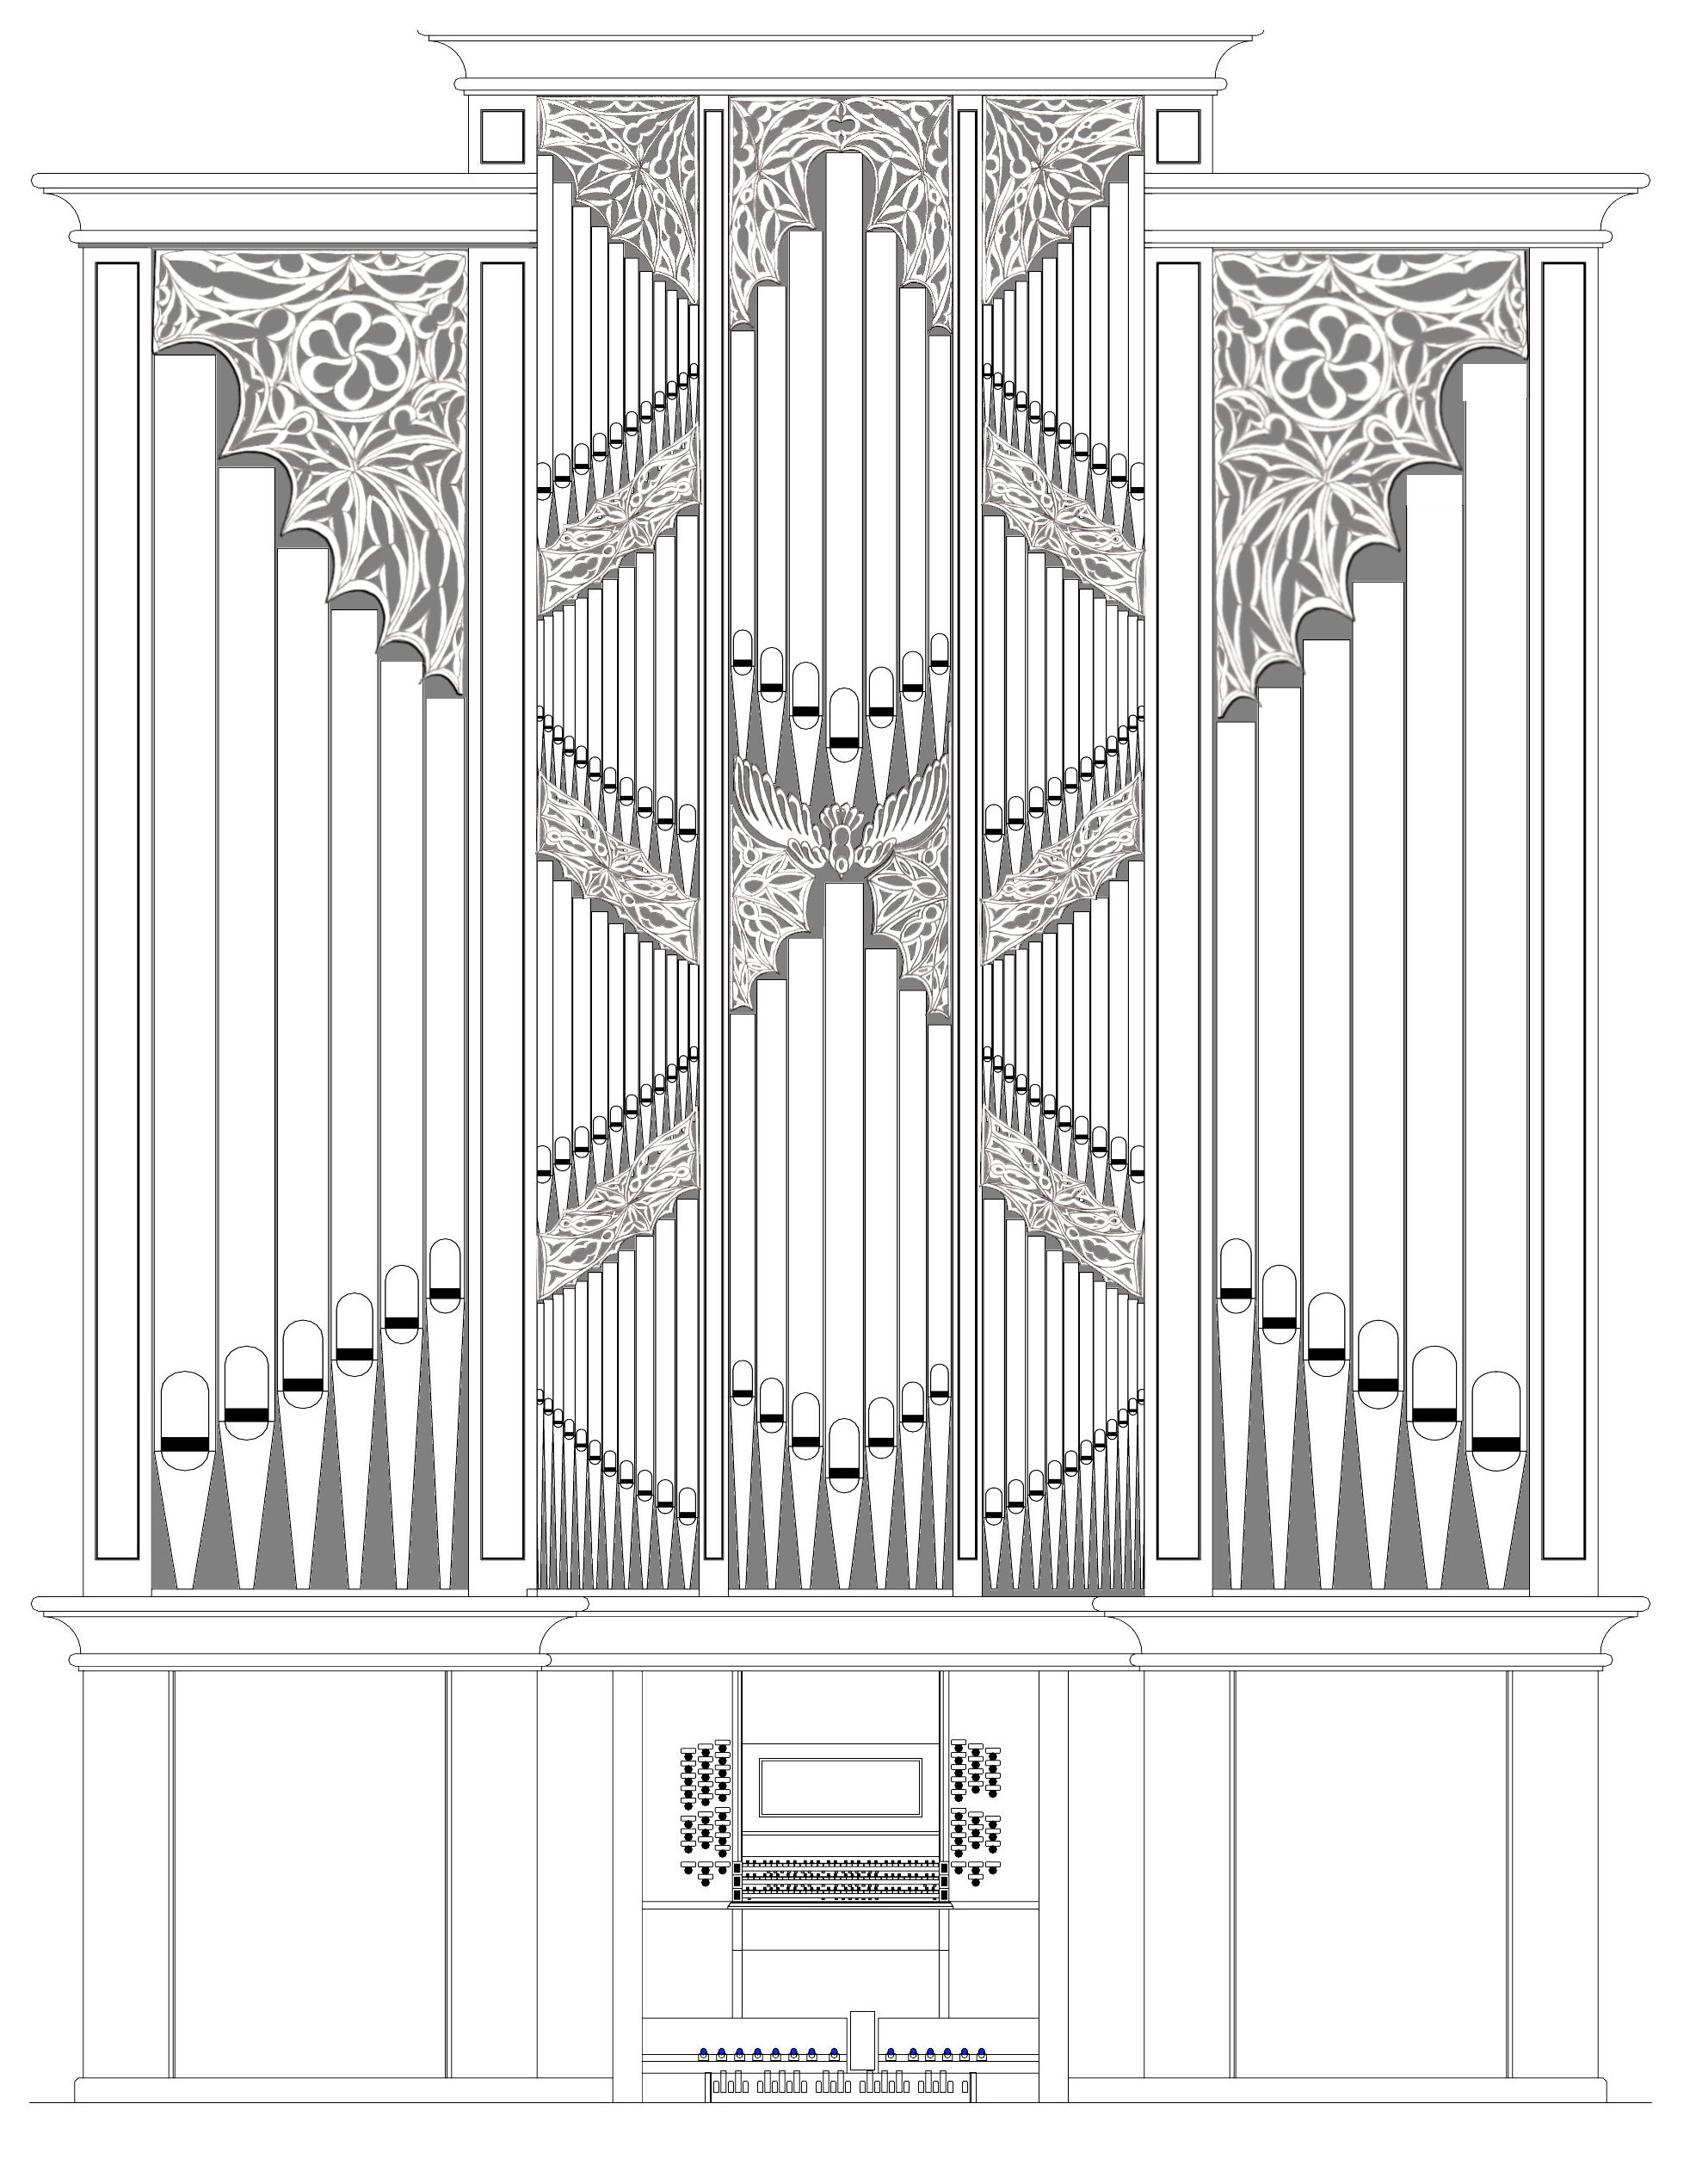
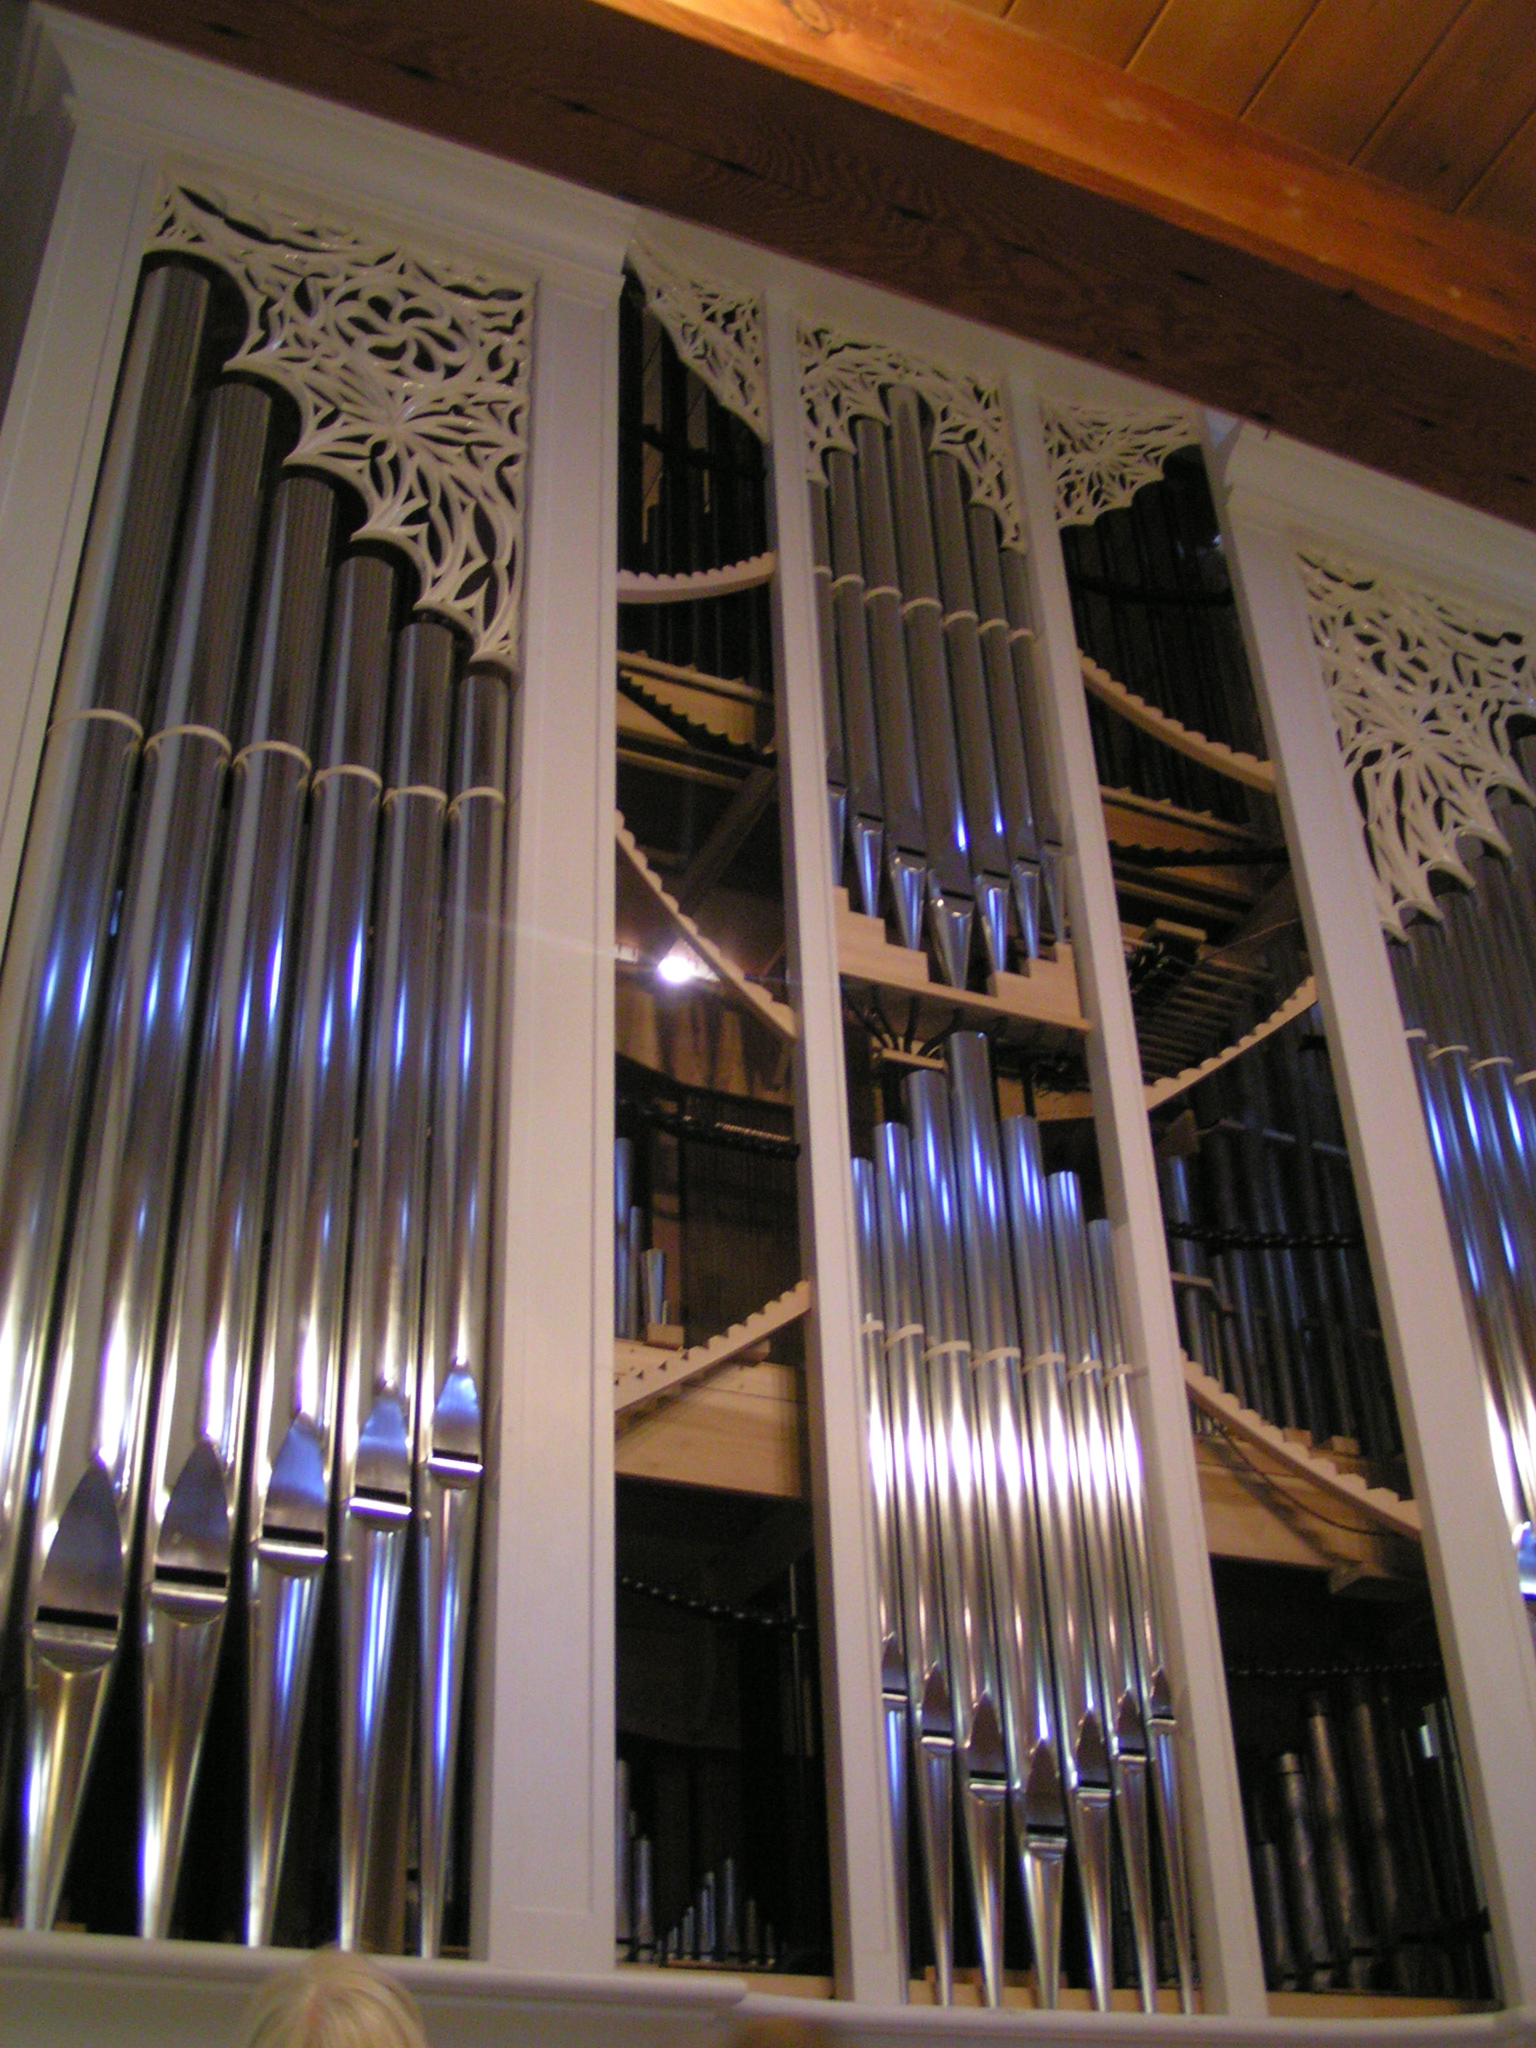
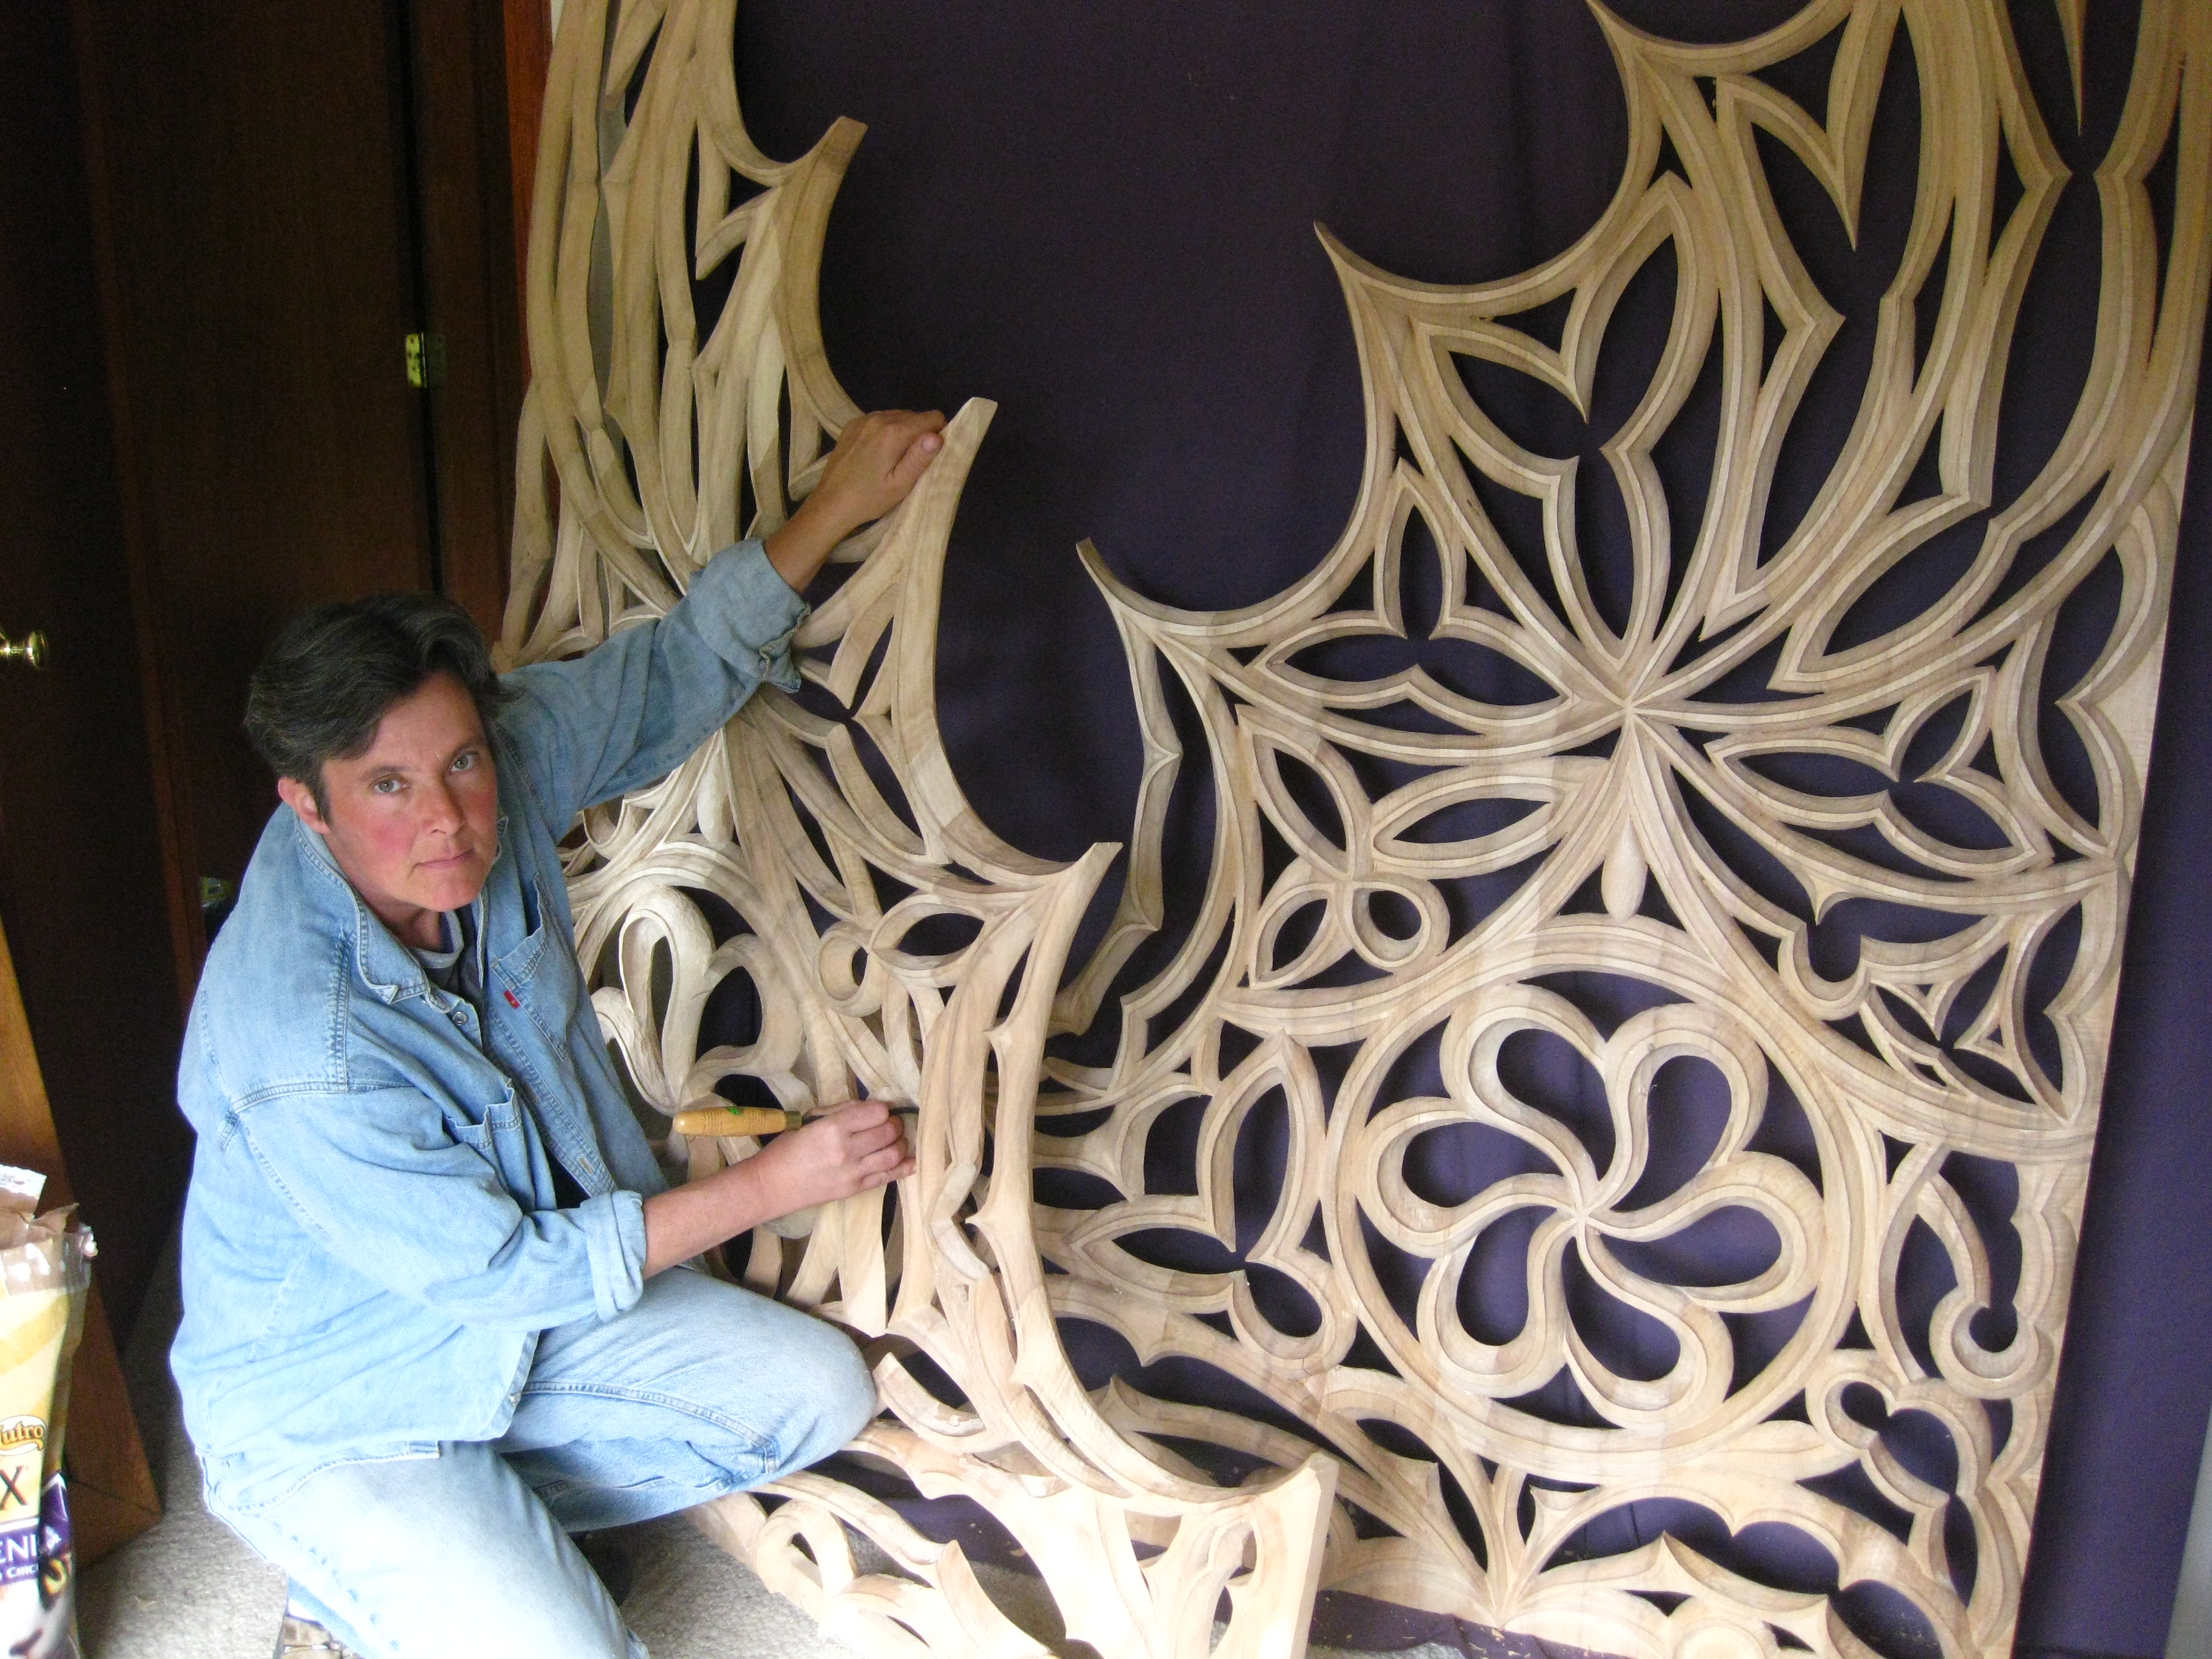
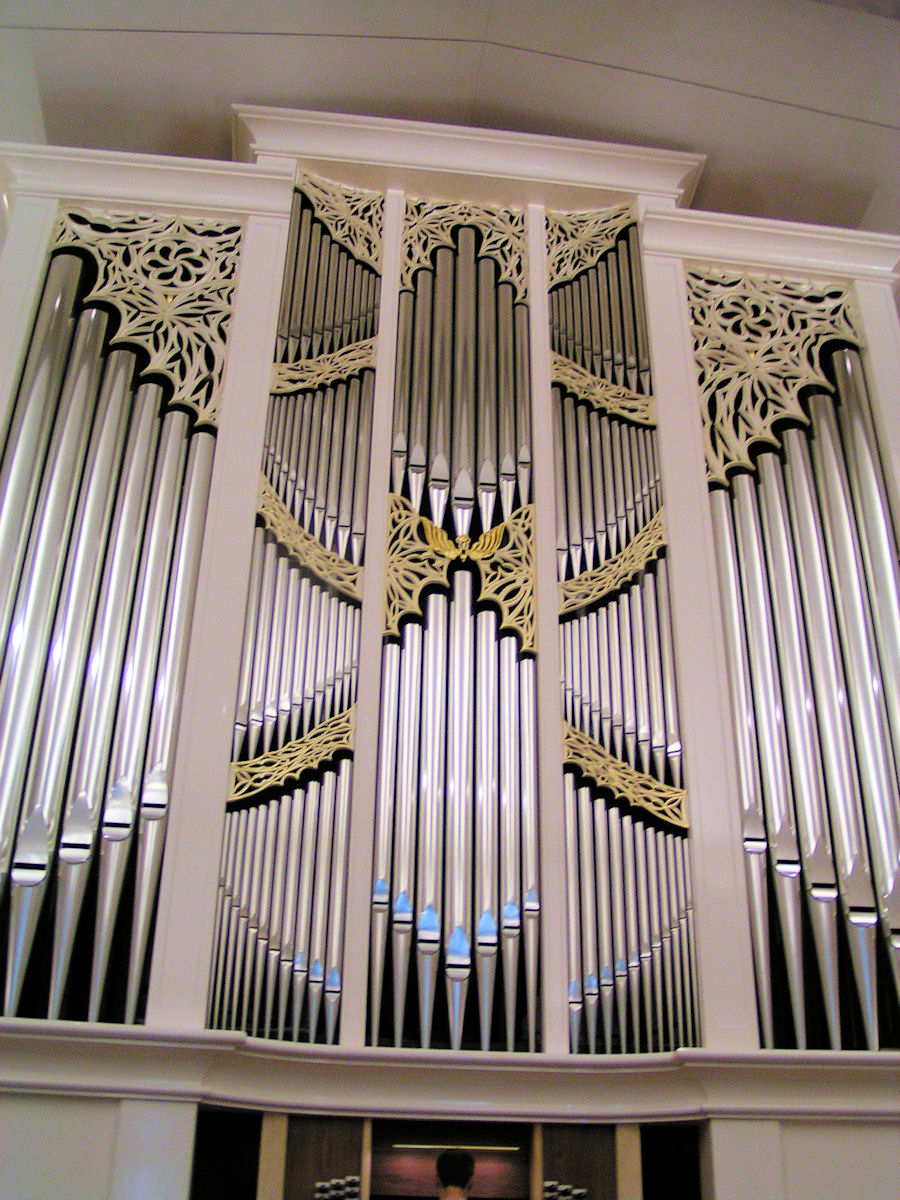
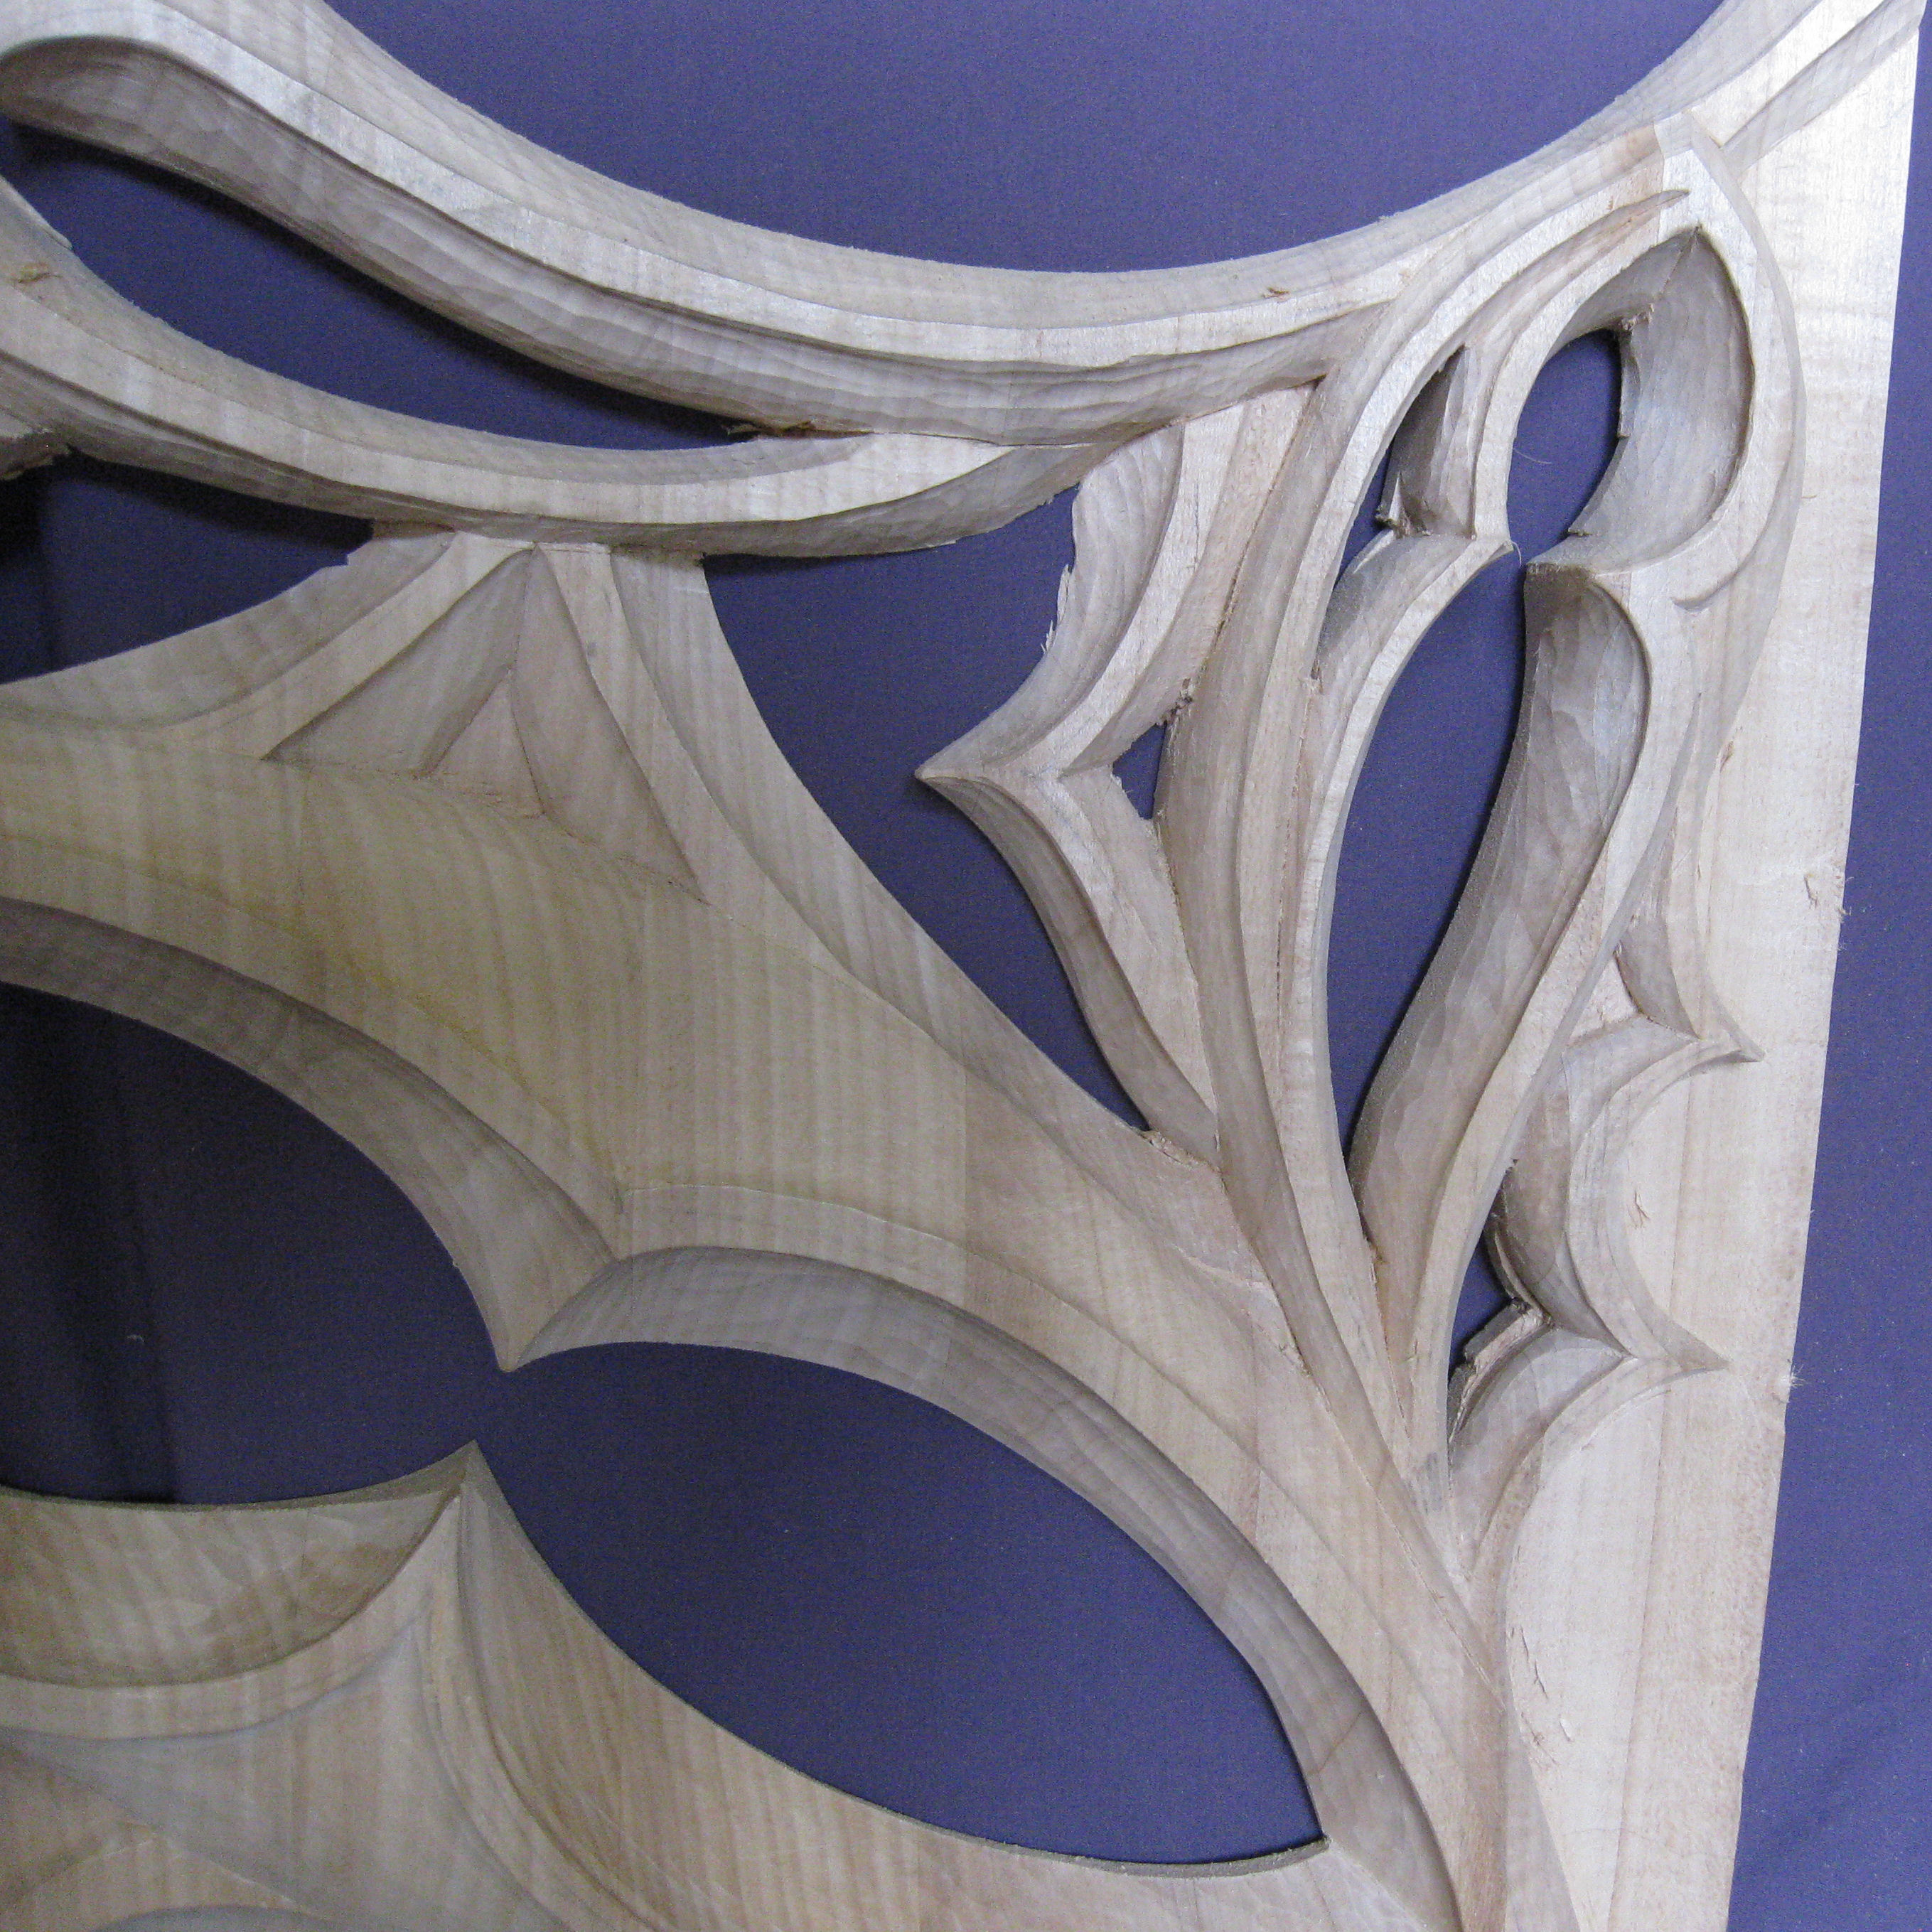
Working on carvings for the pipe organ at St. Philip Presbyterian Church in Houston, TX Create Shadows to Give Depth Sharpening Wood Carving Tools Applying Gold Leaf Routing Down to a Background Tools for Getting into Tight Places
See also: Videos of Organs with Jude's Carvings About Jude |
|
Create Shadows to Give Depth
St. Philip Presbyterian Church
|
Carving for Houston's St. Philip Presbyterian Church, May 2009, 1:11 minutes. MP4 (7.4 MB) REAL (8.2 MB) In this video, I show show how adding even just a little bit of an undercut casts a shadow and gives more depth to get as much three dimension as you can with the thickness of the wood that you have. |
MP4 plays better than REAL
Download Real Player (Free)
Download VLC Media Player for MP4 (Free)
Gold Leafing
St. Philip Presbyterian Church
|
Gold leafing the dove for Houston's St. Philip Presbyterian Church, December 25 2009, 7:10 minutes. |
|
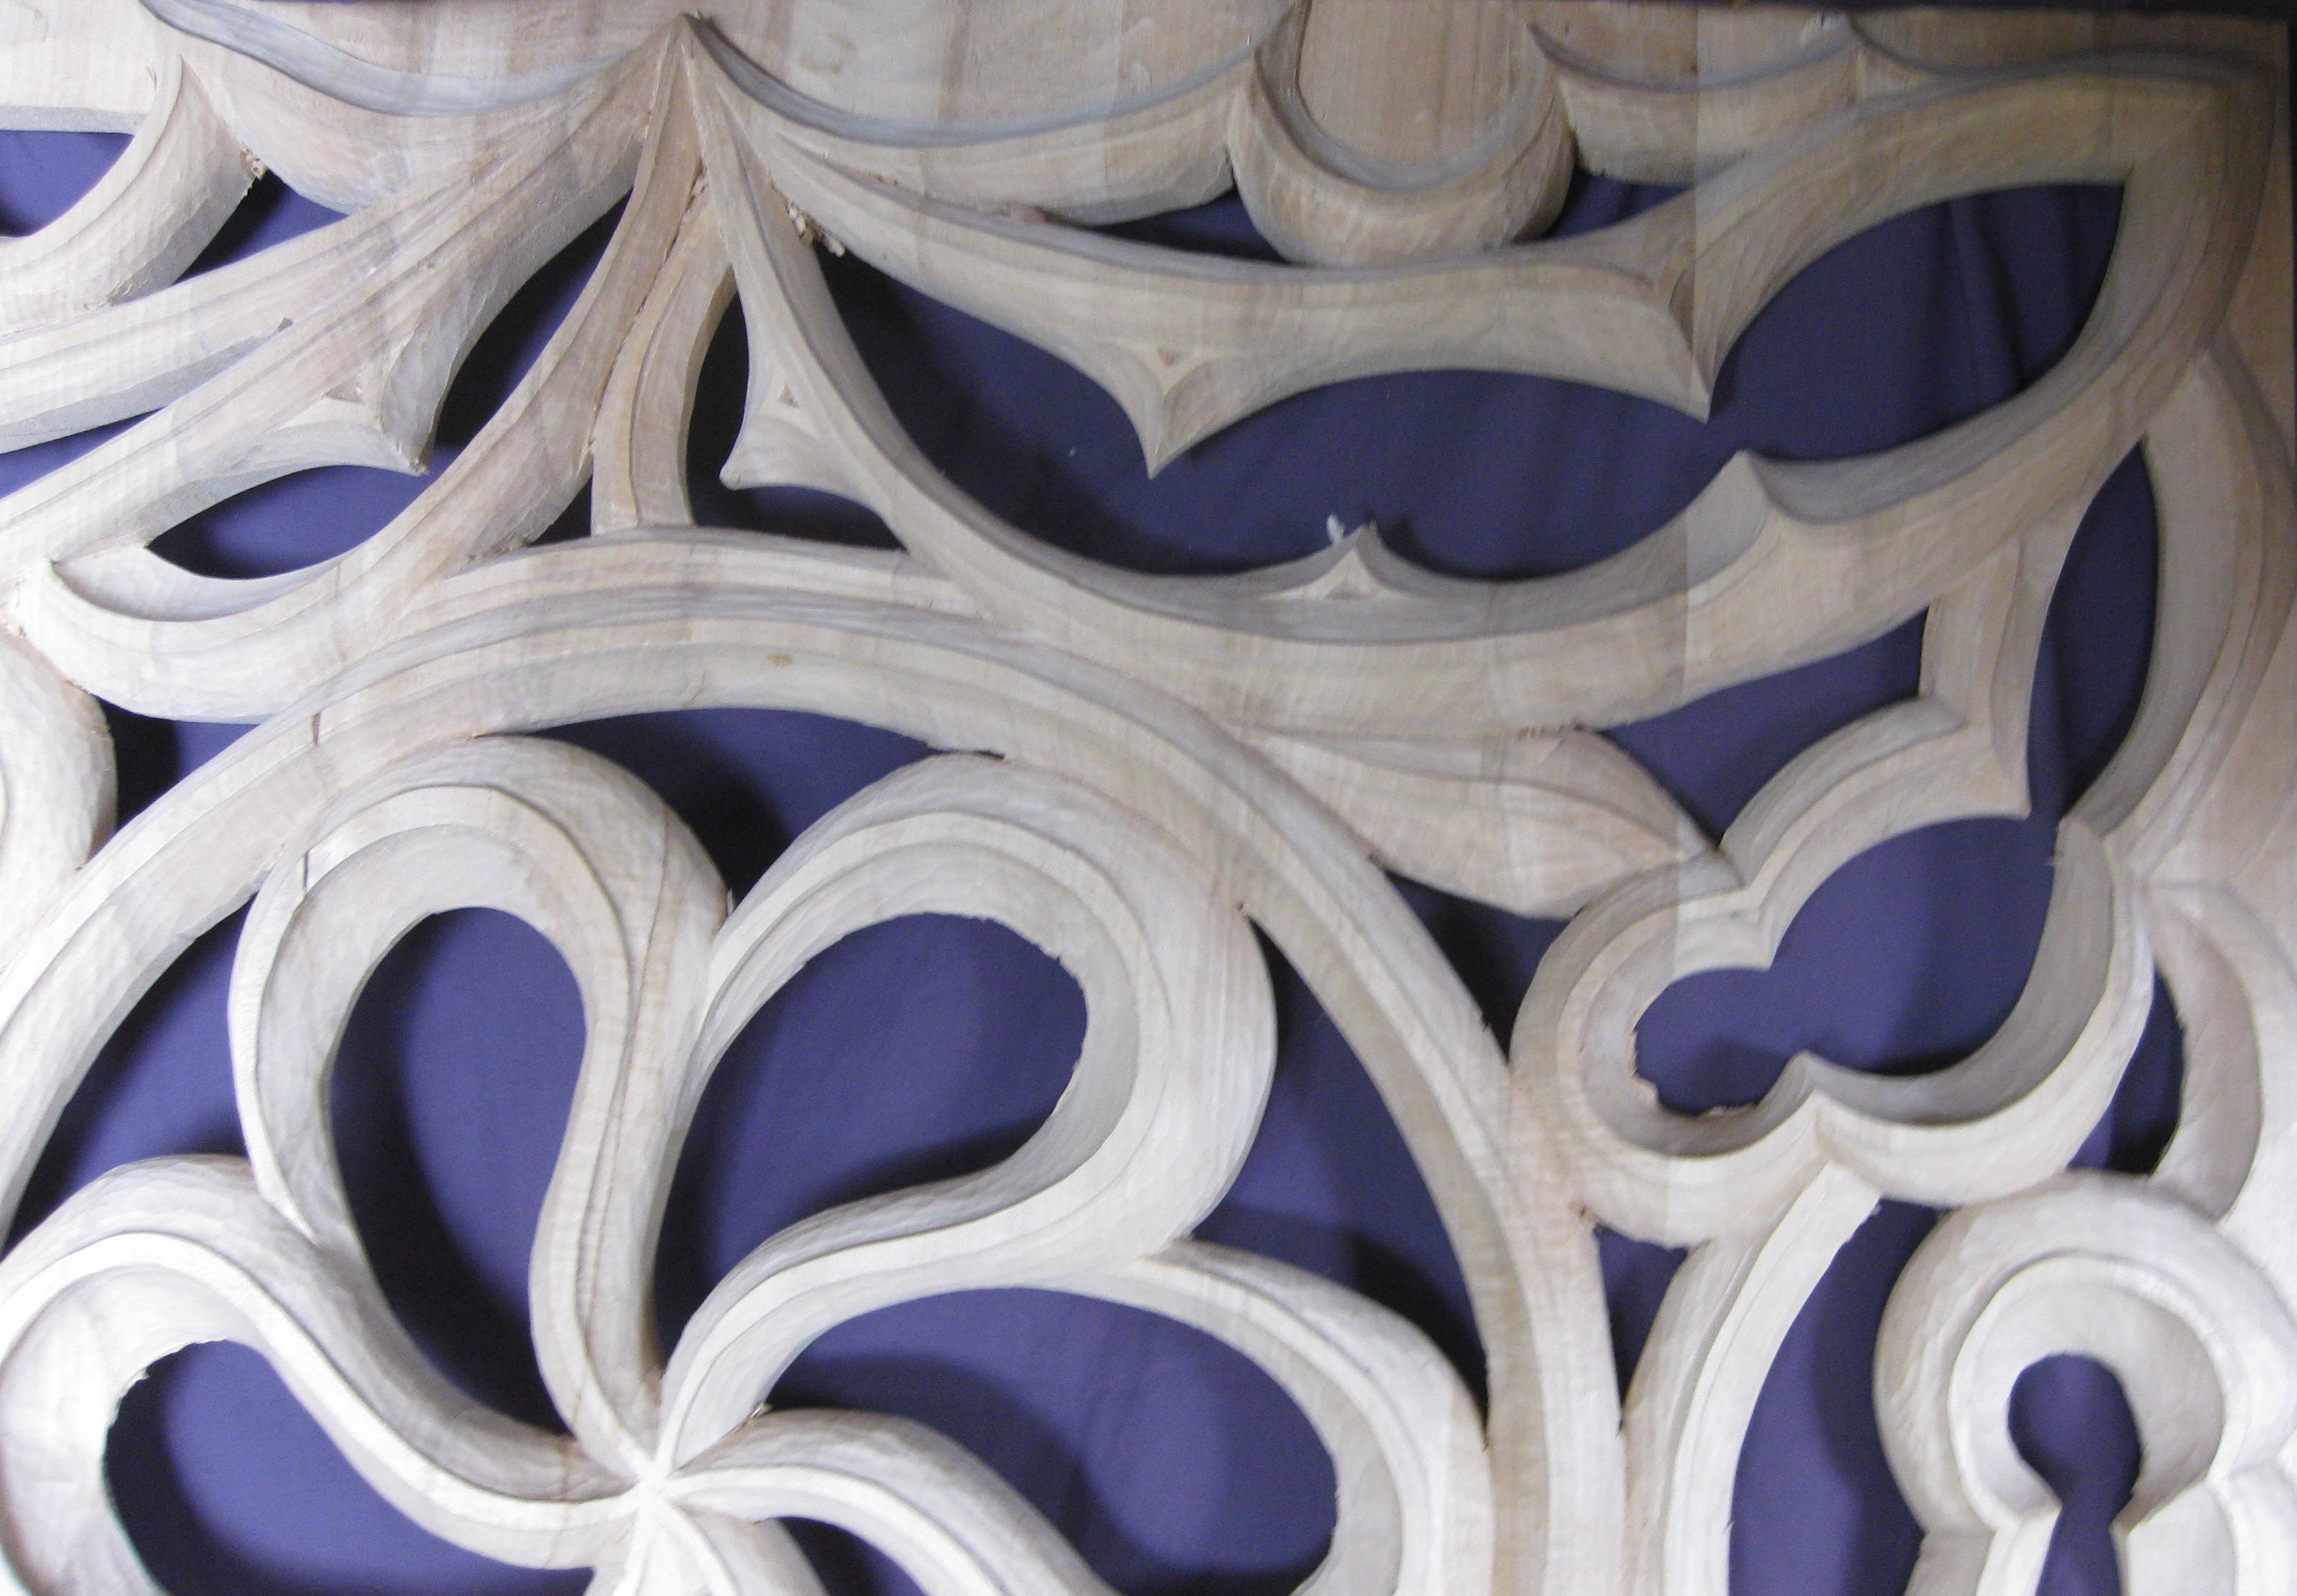
The pipe shades for the St. Philip pipe organ have gold leaf to highlight the lines of the gothic tracery design. At the focal point of the carvings, the downward facing dove is entirely gold leafed as shown in this video. Gold leaf is gold that is hammered into extremely thin sheets. To gold leaf the dove, I am using loose leaf books each with 25 sheets of 24 kt gold separated by tissue paper. Gold also comes in rolls of various widths transfer-pressed onto thin paper. Rolls were used to create the highlighted lines in other parts of the carving. The first step in gold leafing is to apply "sizing" to the areas of the carving that you want gold leafed. Sizing is a mixture of linseed oil and paint thinner that adheres the leaf to the surface. I use slow-set clear oil gold size by Rolco. It's very important to apply the gold leaf when the sizing has just the right tackiness, which may take 12 hours or so depending on conditions. To test, touch the surface with your knuckle. You should hear a little click as you pull it away (See minute 0:17 in video.) The sizing shouldn't feel too sticky. If the sizing is too wet the gold leaf will be dull. If it's too dry the leaf won't stick and it'll be patchy. (I've had it look like a dalmation before when it's been too dry and when that happens you have to start all over.) Brushes are used to handle the gold leaves because genuine gold leaf disintigrates into pieces if you handle it with your fingers. I use a squirrel hair brush to pick up and apply the gold leaf (See minute 1:30 in video.) I stroke it on my hair a few times to give it static electricity. I am then able to pick the leaf up and float it on to the carving. Lightly tap and press the gold leaf into place with the squirrel hair brush. Then with a smaller soft hair brush I go over it to ensure it's completely adhered and to remove excess. You can tear off little pieces or use stray bits of gold leaf to patch any spots that need it. I split each leaf into smaller sections as needed by tearing it gently with two brushes (See minute 3:35 in video.) Some people use a razor blade or a gilder's knife to trim it into strips but using brushes is quicker and works fine. After at least two days to sometimes two weeks, I will polish the gold leaf by lightly buffing it with a cotton ball. The sizing must be completely dry before buffing it. If you do it too soon, it will damage the gold leaf and cotton fibers will stick to it. Carolyn (the other voice in this video) sometimes likes to touch and run her hands over carvings when I'm finished with them. I have to shoo her away so she doesn't dull the finish of the gold leaf. |
Sharpening Wood Carving Tools
St. Philip Presbyterian Church
|
Sharpening tools at my shop in Olympia, WA., July 2009, 5:19 minutes. http://www.youtube.com/watch?v=zUwKLNVW1AE Excerpt from video above showing hand motion sharpening a gouge on a Japanese water stone, 0:15 minutes http://www.youtube.com/watch?v=vUE4AhBzVD8 |
|
Carving tools must be sharpened frequently to maintain a razor sharp edge. I use Japanese water stones to sharpen my tools. After wetting the stone, I make a slurry on its surface by rubbing it with a softer stone (starting at minute 1:16 in the video). Water stones sharpen much smoother and faster than oil stones and are less messy. I show the motion of sharpening a gouge starting at about minute 1:40 in the video. Rock the chisel along its curved tip while moving it in an oval on the wet stone. Notice I keep my wrist at the same level so the tool is sharpened at a consistent angle. Once you get the motion down, it becomes a nice smooth rhythm that you don't even have to think about. (1:40) Check the tip of the chisel periodically as you sharpen until you get a little bit of a burr on the front. Take that off with a slip stone and then move to the polishing stone. Be sure to rinse the chisel off before you move to the next stone so as to not mix coarsenesses. Also, rinse off the coarse stone before putting it back in the water (2:40). Two cotton buffing wheels are used to get the super sharp, mirror-like finish. (3:30) Buffing wheels are often used nowadays instead of the leather strops that were traditionally used. Put a little rubbing compound on the wheel. Hold the chisel on the buffing wheel without pushing hard. Get the back and a little on the front, too. Always wipe the chisel off before you go to the next grade of compound. The result is a very shiny, razor sharp edge (4:50) In between sharpenings, you can touch up the edge a few times on the fine buffing wheel before having to sharpen again (5:00). One of the cotton buffing wheels on my grinder is firm and the other, soft. Buffing compounds are graded in either numbers or letters, depending on the brand. For the firm buffing wheel, you'll want to get hard compound -- black for heavy duty cleaning. After I sharpen on my water stones, I use this to start. Always wipe it off before you go to the softer compound for use on the soft wheel. This is white rouge for shining to a high gloss finish on hard metals. Hardware stores carry these. |
Routing Down to the Carving's Background
St. Philip Presbyterian Church
|
Clip 1 Cutting around an area using a router Clip 2 Knocking out the excess with a chisel Clip 3 Cleaning up the surface |
Video Series: May 2009
In this video series, I show how to create a deeper level of a carving using a router and chisels. Carvings of any thickness will have areas at different depths. Traditionally wood was removed from deeper areas using a stop cut knife to cut a line around it and then chiseling out the wood down to the desired level. Instead of using a stop cut knife, I use a router to cut a line around the area. I then remove the wood with a chisel. You could route the whole area down, but it's quicker (and not so noisy) to use a chisel to remove the bulk of the wood. I attach a board to the bottom of the router so it stays level and is supported all along the top of the carving. I can do that with this carving because it has enough flat surface for the router to ride on. Clip 1 shows cutting around the area with the router. Clip 2 shows knocking out the excess wood. Clip 3 shows cleaning up the surface afterwards. |
Tools to Get into a Tight Spot
St. Philip Presbyterian Church
|
Video 4: Carving for Houston's St. Philip Presbyterian Church, May 2009, 2:23 minutes. MP4 (11.0 MB) REAL (11.0 MB) In this video I show tools for getting into a tight spot starting at about 1:00 minutes. When I refer to the tools used in Africa, I am referring to a visit to a wood carving shop in Ghana that Carolyn (the "webmaster" and other voice in this video) visited in May 2009. Send us an email if you're interested in seeing her videos from that visit. |
|
|
Jude FrittsWood Carving & Wood Carved Sculpture Olympia, Washington |